
wooden bunk bed assembly instructions
Assembling a wooden bunk bed is an exciting yet challenging DIY project that requires attention to detail and patience. With the right tools and guidance, you can create a safe, sturdy, and space-saving sleeping solution for any room.

Preparation for Assembly
Preparation for assembly involves organizing instructions, verifying all components, and planning the workspace. Ensure tools and materials are ready, and clear the area for safe assembly. Proper planning prevents delays and ensures a smooth process.
2.1. Tools and Materials Needed
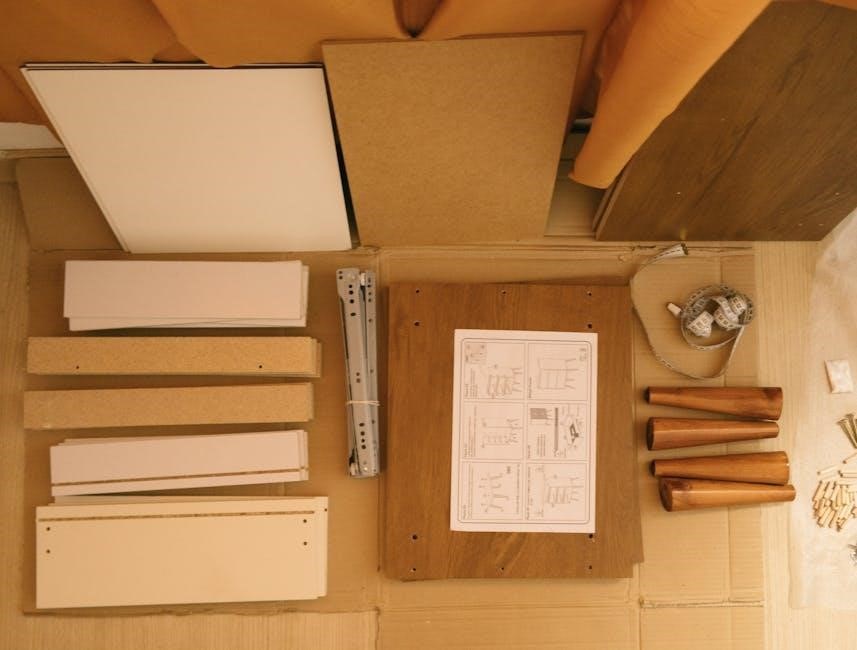
Assembling a wooden bunk bed requires specific tools and materials to ensure the process is efficient and safe. Essential tools include a screwdriver (both flathead and Phillips), an Allen wrench, a cordless drill with screwdriver and drill bits, a hammer, and a tape measure. Additionally, a level and clamps may be useful for aligning and holding parts securely. Materials provided with the bunk bed typically include pre-drilled wood planks, bolts, screws, dowels, and cam locks for securing joints. Always check the inventory list provided with the bed to confirm all components are included before starting. Safety gear, such as gloves and safety goggles, is also recommended to protect yourself during assembly. A rubber mallet can be handy for gently tapping pieces into place without causing damage. Organizing all tools and materials in a accessible workspace will streamline the assembly process and reduce the risk of delays. Always refer to the manufacturer’s instructions for any specific tools or materials required for your particular bunk bed model.
2.2. Workspace Setup and Safety Precautions
Setting up a proper workspace is crucial for a successful and safe assembly process. Begin by clearing a large, flat, and stable area, such as a garage floor or living room, ensuring there are no obstacles or tripping hazards. Cover the floor with a drop cloth or old sheets to protect it from damage or scratches. Good lighting is essential, so position lamps or overhead lights to illuminate the workspace evenly. Ensure proper ventilation, especially if using wood glue or sealants. Always wear protective gear, such as gloves and safety goggles, to prevent injuries from sharp edges or flying debris. Loose clothing or long jewelry should be secured to avoid accidental entanglement with tools. Keep children and pets away from the workspace to minimize distractions and potential accidents. Finally, read through the instructions carefully and familiarize yourself with the assembly process before starting. A well-prepared workspace and adherence to safety guidelines will significantly reduce the risk of errors and injuries.

Understanding the Components of a Wooden Bunk Bed
Understanding the components of a wooden bunk bed is essential for successful assembly and safe use. A typical bunk bed consists of two main frames: the lower and upper bunks. The frames are constructed from wooden panels or slats, which provide structural support. The side rails and end rails form the perimeter of each bunk, while the support slats or a solid wood board act as the base for the mattress. The ladder is a critical component, allowing access to the upper bunk, and is usually detachable or permanently attached. Guardrails are installed along the upper bunk to prevent accidental falls. Additional components include bolts, screws, and Allen wrenches for assembly, as well as decorative elements like wood knobs or trims. Familiarizing yourself with these parts ensures proper assembly and helps identify any missing items. Always refer to the manufacturer’s diagram or parts list to confirm all components are included and accounted for before starting the assembly process. This step ensures a smooth and efficient building experience.

Safety Considerations and Precautions
Ensuring safety is paramount when assembling a wooden bunk bed. Always wear protective gear, such as gloves and safety glasses, to prevent injuries from sharp edges or tools. Keep the workspace clear of clutter and tripping hazards to maintain a safe environment. Avoid wearing loose clothing that could get caught in tools or hardware. If working with power tools, ensure they are in good condition and used properly to prevent accidents. Never leave assembled parts unattended, especially if children are present.
Check the weight capacity of the bunk bed, as specified by the manufacturer, to ensure it can safely support the intended users. Exceeding this limit could lead to structural failure. Additionally, ensure all bolts and screws are tightened securely to prevent the bed from shifting or collapsing. Always follow the manufacturer’s instructions for assembly to avoid creating an unstable structure.
After assembly, conduct a final inspection to verify stability and ensure all safety features, such as guardrails, are properly secured. Supervise children when they use the bunk bed, especially the ladder, to minimize the risk of accidents. By prioritizing safety, you can create a durable and secure sleeping solution for years to come.

Step-by-Step Assembly Guide
Begin by unboxing and organizing all components. Assemble the bed frame using the provided hardware, ensuring all bolts are securely tightened. Attach the side rails and support slats, then install the ladder and guardrails. Finally, place the mattresses and test the stability of the bunk bed.
5.1. Building the Bed Frame
Start by assembling the base of the bed frame. Unpack the side rails, headboard, footboard, and support legs. Use the Allen wrench to attach the legs to the side rails, ensuring they are evenly spaced and securely fastened. Next, connect the side rails to the headboard and footboard using the bolts provided. Tighten all connections firmly to ensure stability. If your bunk bed has a lower bed frame, repeat the process for the second frame, making sure it aligns perfectly with the upper frame. Use the slats or support boards to create a sturdy base for the mattresses. Double-check all bolts and screws to confirm they are tightened properly. A solid frame is essential for safety and durability, so take your time to ensure every joint is secure. Once the frame is built, move on to attaching the ladder and other components.
5.2. Installing the Ladder
Once the bed frame is assembled, focus on installing the ladder. Locate the pre-drilled holes on the side of the bed frame where the ladder will attach. Align the ladder’s mounting brackets with these holes and secure them using the provided bolts. Tighten the bolts firmly with an Allen wrench to ensure the ladder is stable and even. Double-check the ladder’s angle to ensure it is neither too steep nor too shallow for safe climbing.
Next, attach the ladder’s side rails to the mounting brackets. Use the screws provided to secure these rails, making sure they are tightly fastened. Test the ladder by gently rocking it back and forth to confirm it is sturdy and well-attached. Finally, inspect the ladder rungs to ensure they are evenly spaced and secure. For added safety, consider attaching non-slip strips to the rungs if they are not already included. Once the ladder is installed, proceed to the next step of attaching the mattress frames.
5.3. Attaching the Mattress Frames
With the ladder securely installed, proceed to attach the mattress frames to the bunk bed. Start by positioning the upper and lower mattress frames according to the manufacturer’s specifications. Ensure the frames are aligned with the bed’s support brackets and pre-drilled holes.
Use the provided screws to secure the mattress frames to the bed. Tighten them firmly to create a sturdy base for the mattresses; Next, place the slats evenly across the mattress frames, ensuring they are spaced correctly to provide adequate support. Secure the slats with the screws or clips provided in the hardware kit.
Once the slats are in place, add any additional support beams or center legs to reinforce the mattress frames. Double-check that all screws are tightened properly and that the frames are level. Finally, test the stability of the mattress frames by gently applying pressure to ensure they can hold the weight of the mattresses without shifting or flexing.
5.4. Adding Safety Rails
After securing the mattress frames, focus on installing the safety rails for both the upper and lower bunks. These rails are essential to prevent falls and ensure the safety of the occupants. Begin by identifying the correct positions for the safety rails on the bed frame, as indicated in the instruction manual.
Align the safety rails with the pre-drilled holes on the bed frame and attach them using the provided bolts or screws. Ensure the rails are tightly secured and evenly spaced for maximum stability. Repeat the process for the lower bunk, making sure the rails are at the same height for consistency.
Double-check that all safety rails are properly aligned and securely fastened. Test the rails by gently applying pressure to ensure they can withstand weight without shifting. Finally, inspect the entire bed to confirm that the safety rails are correctly installed and provide adequate protection for the users.
Remember, safety rails are a critical feature of bunk beds, so take extra care to ensure they are installed correctly and securely.

Final Safety Checks and Inspection
Once the assembly is complete, conduct a thorough safety inspection to ensure the bunk bed is stable, secure, and safe for use. Start by examining all bolts, screws, and connections to confirm they are tightly fastened and properly aligned. Check for any signs of damage or wear on the wood or hardware;
Verify that the safety rails are securely attached and extend at least 5 inches above the mattress to prevent accidental falls. Ensure the ladder is firmly anchored to the bed frame and all rungs are evenly spaced and sturdy. Test the ladder by applying gentle pressure to confirm it does not wobble or shift.
Inspect the mattress frames to ensure they are level and properly supported. Double-check that all slats are in place and evenly spaced to provide adequate support for the mattresses. Finally, test the bed by applying gentle weight to different areas to ensure it remains stable and does not creak or sway.
Perform a visual inspection to ensure all safety features are intact and functioning as intended. Address any issues immediately before allowing the bed to be used. Regular safety checks should also be performed over time to maintain the bed’s integrity.

Maintenance and Upkeep Tips
Regular maintenance is crucial to ensure the longevity and stability of your wooden bunk bed. Dust and vacuum the bed frame and ladder regularly to prevent dirt buildup, which can cause wear and tear. Use a soft cloth to wipe down surfaces, avoiding harsh chemicals that may damage the wood finish.
Inspect the bed periodically for any signs of damage, such as cracks, dents, or loose joints. Tighten any bolts or screws that may have come loose over time. If you notice any structural issues, address them immediately to prevent further damage.
Protect the wood by applying a furniture wax or polish periodically. This will maintain the shine and protect the surface from scratches. Ensure mattresses are placed evenly and securely on the frames to avoid putting uneven pressure on the slats.
Teach children to climb the ladder safely and avoid jumping or applying excessive force to the bed. For added protection, consider using bed rail guards or mattress protectors to prevent accidental falls or spills.

Store bedding and toys neatly to avoid clutter, which can create tripping hazards or put additional strain on the bed. Regular upkeep ensures the bunk bed remains safe, sturdy, and visually appealing for years to come.
Troubleshooting Common Assembly Issues
During the assembly of a wooden bunk bed, you may encounter common issues that can delay completion. One of the most frequent problems is missing or misaligned pre-drilled holes, which can make it difficult to secure bolts or screws properly. In such cases, double-check the instructions to ensure you are using the correct components. If the issue persists, consider drilling new pilot holes carefully to avoid damaging the wood.
Another common issue is loose joints or wobbly frames, often caused by insufficient tightening of bolts or uneven surfaces. Use a spirit level to ensure the bed frame is stable and tighten all connections firmly. If the problem remains, apply wood glue to the joints for added stability before clamping them overnight.
Additionally, parts may sometimes fit too tightly, making assembly challenging. Apply a small amount of furniture wax or silicone spray to reduce friction and ease the process. If a part breaks during assembly, contact the manufacturer for a replacement rather than attempting to repair it yourself.
By addressing these issues methodically, you can resolve most assembly problems efficiently and ensure a sturdy, safe bunk bed.

Tips for Successful and Stress-Free Assembly
Assembling a wooden bunk bed can be a rewarding DIY project if approached with the right mindset and strategies. Start by thoroughly reading the instructions and visualizing each step to avoid confusion. Gather all tools and components beforehand, ensuring everything is organized and within easy reach. Working in a team can significantly simplify the process, as an extra pair of hands can help with heavy parts or stabilizing sections during assembly.
Always follow the manufacturer’s instructions precisely, as deviations may lead to structural instability. Use a rubber mallet instead of a hammer to prevent damaging the wood, and apply wood glue to joints for added strength. Double-check each step before moving forward to catch any potential errors early. If you encounter confusion, pause and revisit the instructions rather than guessing, which could lead to disassembly later.
Take regular breaks to maintain focus and avoid fatigue, as rushing can increase the risk of mistakes. Finally, ensure all bolts and screws are tightened securely but avoid over-tightening, which could strip the wood. With patience and attention to detail, you’ll complete the assembly efficiently and enjoy a sturdy, safe bunk bed.