wallbox pulsar plus installation manual
Wallbox Pulsar Plus Installation Manual: A Comprehensive Guide
This manual provides detailed instructions for safely installing and configuring your Wallbox Pulsar Plus EV charger, ensuring optimal performance and a seamless charging experience.
Wallbox expands nationwide, delivering Pulsar Pro North America, and introduces the Pulsar Plus 48 to the market, offering smart charging and energy management solutions.
Power Boost and Eco-Smart features dynamically adjust charging based on home energy usage, maximizing efficiency and convenience for electric vehicle owners across the continent.
Understanding the Wallbox Pulsar Plus
The Wallbox Pulsar Plus is a smart Level 2 electric vehicle (EV) charger designed for convenient and efficient home charging. It’s recognized as one of the best residential EV chargers currently available, praised for its ease of use and extensive connectivity features.
Unlike relying on public fast-charging stations, many EV owners, having driven over 10,000 miles, haven’t needed them, opting for the convenience of home charging. The Pulsar Plus offers a powerful solution, especially with the North American launch of the updated model.
Key to its functionality are features like Power Boost, which intelligently manages charging based on your home’s real-time energy consumption, and Eco-Smart, allowing users to optimize charging schedules. Wallbox’s partnership with Fisker further solidifies its position as a leading provider of home EV charging solutions.
Key Features and Specifications
The Wallbox Pulsar Plus boasts a range of features designed for optimal EV charging. It’s a smart charger, enabling control and monitoring via the Wallbox app, including scheduling and energy management. Power Boost dynamically adjusts charging speed based on your home’s energy usage, preventing overload.
Eco-Smart further enhances efficiency by allowing users to tailor charging to their needs. The Pulsar Plus is compatible with a wide array of electric vehicle models, and Wallbox’s partnership with Fisker ensures seamless integration with Fisker vehicles.
The recently introduced Pulsar Plus 48 is specifically tailored for the North American market. It offers a robust and reliable charging solution, simplifying the EV ownership experience with its user-friendly interface and comprehensive connectivity options.
Safety Precautions Before Installation
Prior to installing your Wallbox Pulsar Plus, strict adherence to safety guidelines is paramount. Always disconnect power at the main electrical panel before commencing any wiring work. Verify your home’s electrical system is compatible and meets the charger’s requirements.
Installation should ideally be performed by a qualified and licensed electrician to ensure compliance with local electrical codes. Inspect all components for damage before installation, and never attempt to install a damaged unit.
Ensure the mounting location is structurally sound and can support the weight of the charger. Proper grounding is crucial for safety; confirm a reliable ground connection is established. Ignoring these precautions could lead to electrical shock or damage to your vehicle and property.

Installation Process
The installation involves mounting the Wallbox securely, carefully connecting the electrical wiring, and ensuring a stable connection to your home’s electrical panel.
Qualified electricians are recommended for safe and compliant setup.
Required Tools and Materials
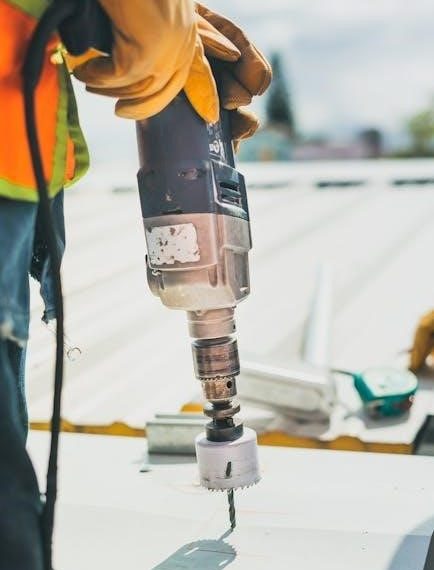
Before beginning the installation of your Wallbox Pulsar Plus, gather all necessary tools and materials to ensure a smooth and efficient process. Essential tools include a drill with appropriate drill bits for your wall type, a screwdriver set (Phillips and flathead), wire strippers, wire connectors (wire nuts), and a voltage tester to verify power is off.
You will also need a level to ensure the Wallbox is mounted straight, a pencil for marking mounting holes, and potentially a stud finder if mounting on drywall. Regarding materials, ensure you have the Wallbox Pulsar Plus unit itself, mounting screws and anchors appropriate for your wall, electrical wiring of the correct gauge (consult local electrical codes), and potentially conduit and fittings depending on your installation requirements.
Don’t forget appropriate personal protective equipment (PPE) such as safety glasses and gloves. Finally, have a copy of this installation manual and any relevant local electrical codes readily available for reference.
Mounting the Wallbox
Carefully select a mounting location for your Wallbox Pulsar Plus, ensuring it’s easily accessible, protected from the elements, and within reach of your vehicle’s charging cable. Use a stud finder to locate wall studs for secure mounting, or utilize appropriate wall anchors if studs are not available.
Using the provided mounting template, mark the drill hole locations on the wall with a pencil. Drill the holes to the correct depth and insert the wall anchors if necessary. Align the Wallbox mounting bracket with the drilled holes and secure it to the wall using the provided screws.
Ensure the bracket is level before fully tightening the screws. Once the bracket is securely mounted, carefully align the Wallbox unit with the bracket and slide it into place until it clicks securely. Double-check that the Wallbox is firmly attached and stable before proceeding to the electrical connection stage.
Electrical Connection – Wiring Diagram
Before commencing any electrical work, ALWAYS disconnect power to the circuit at the breaker box. The Wallbox Pulsar Plus requires a dedicated circuit, typically 40 or 50 amps, depending on the model and local electrical codes. Consult a qualified electrician to determine the appropriate circuit size for your installation.
The wiring diagram typically involves connecting the black (hot) wire, white (neutral) wire, and green or bare copper (ground) wire from your electrical panel to the corresponding terminals on the Wallbox. Incorrect wiring can cause serious damage or electrical shock;
Ensure all connections are tight and secure. Use appropriately sized wire connectors and follow all local and national electrical codes; A professional electrician is highly recommended for this step to ensure a safe and compliant installation. Refer to the detailed wiring diagram included with your Wallbox for specific instructions.
Connecting to Your Home’s Electrical Panel
This step MUST be performed by a qualified and licensed electrician. Connecting the Wallbox Pulsar Plus to your home’s electrical panel involves running a dedicated circuit from the breaker box to the Wallbox mounting location. The electrician will assess your panel’s capacity and install a correctly sized breaker – typically 40 or 50 amps – to accommodate the charger’s power demands.
Proper grounding is crucial for safety. The electrician will ensure a secure ground connection between the Wallbox, the conduit, and your electrical panel’s grounding system. Incorrect grounding can lead to electrical hazards.
Conduit may be required to protect the wiring, depending on local codes. The electrician will follow all applicable regulations to ensure a safe and compliant installation, verifying the connection before restoring power.

Configuration and Setup
After installation, utilize the Wallbox app for seamless configuration, connecting your charger to Wi-Fi, scheduling charging times, and enabling Power Boost for optimized energy use.
The app allows for personalized settings and monitoring of your EV charging sessions, enhancing convenience and control.
Enjoy smart features like Eco-Smart for efficient energy management.

Downloading and Installing the Wallbox App
The Wallbox app is central to configuring and controlling your Pulsar Plus charger, offering a user-friendly interface for managing your charging experience. To begin, visit the Apple App Store (for iOS devices) or the Google Play Store (for Android devices).
Search for “Wallbox” and locate the official application developed by Wallbox. Ensure you select the correct app to avoid potential security risks or functionality issues.
Tap the “Install” button and allow the app to download and install on your smartphone or tablet. The installation process typically takes only a few moments, depending on your internet connection speed.
Once installed, open the app and create a Wallbox account. You will need to provide a valid email address and create a secure password. Follow the on-screen prompts to complete the account creation process. This account will be used to register your Wallbox and access all its features.
Connecting the Wallbox to Your Wi-Fi Network
Establishing a Wi-Fi connection is crucial for remote control, firmware updates, and utilizing smart charging features of your Wallbox Pulsar Plus. Within the Wallbox app, navigate to the “Add Charger” or “Settings” section, typically indicated by a plus (+) icon or a gear symbol.
Select your Pulsar Plus from the list of available devices. The app will initiate a search for nearby Wallbox chargers. Ensure your smartphone or tablet is connected to the 2.4 GHz Wi-Fi network you intend to use with the charger.
Enter your Wi-Fi network password when prompted. Double-check the password for accuracy, as incorrect credentials will prevent the connection. The Wallbox will attempt to connect to your network, and a status indicator will display the progress.
Once connected, the app will confirm the successful connection, and the charger’s status will change to “Online.” A stable Wi-Fi connection ensures optimal performance and access to all features.
Setting Up Charging Schedules

Utilizing charging schedules allows you to optimize energy consumption and potentially benefit from off-peak electricity rates. Within the Wallbox app, access the “Charging Schedules” or “Energy Management” section for your connected Pulsar Plus charger.
You can create customized schedules based on time of day, day of the week, or specific dates. Define start and end times for charging sessions to align with periods of lower electricity demand. Consider setting schedules to avoid peak hours, reducing energy costs.
The app allows for multiple schedules, catering to varying needs and preferences. You can prioritize schedules or set them to run automatically. Regularly review and adjust schedules to adapt to changing energy rates or driving patterns.
Eco-Smart functionality integrates with these schedules, further optimizing charging based on real-time home energy usage, ensuring efficient and cost-effective EV charging.
Configuring Power Sharing (Power Boost)
Power Boost is a key feature of the Wallbox Pulsar Plus, intelligently managing energy distribution within your home. This prevents overloading your electrical panel when multiple high-power appliances are in use simultaneously with EV charging.
Access the “Power Boost” settings within the Wallbox app. The system measures your home’s real-time energy consumption and dynamically adjusts the EV charging rate accordingly. This ensures a stable power supply and avoids tripping breakers.
You’ll typically need to input your home’s electrical panel’s maximum amperage capacity during the setup process. The system then calculates the available power for EV charging.
Power Boost automatically optimizes charging speed, maximizing it when other energy demands are low and reducing it when necessary, providing a seamless and safe charging experience.

Troubleshooting Common Issues
This section addresses typical problems encountered with the Wallbox Pulsar Plus, including connectivity, charging errors, and power-on failures, offering practical solutions for quick resolution.
Connectivity Problems
If your Wallbox Pulsar Plus experiences connectivity issues, begin by verifying your home Wi-Fi network is functioning correctly and that the charger is within range of the signal. Ensure the correct Wi-Fi password was entered during setup within the Wallbox app.
Restarting both your Wi-Fi router and the Wallbox unit can often resolve temporary glitches. Check the Wallbox app for firmware updates, as outdated software can sometimes cause connection instability. If problems persist, confirm that no firewalls or network security settings are blocking the Wallbox’s access to the internet.
Occasionally, interference from other devices can disrupt the Wi-Fi signal. Try relocating the router or charger to minimize potential obstructions. Consult the Wallbox support resources or online forums for further assistance if these steps don’t restore connectivity.
Charging Errors
Encountering charging errors with your Wallbox Pulsar Plus requires systematic troubleshooting. First, verify the charging cable is securely connected to both the Wallbox and your electric vehicle. Inspect the cable for any visible damage, such as cuts or exposed wires.

Check your vehicle’s charging settings to ensure compatibility with the Wallbox and that charging isn’t paused or scheduled for a later time. If the error persists, consult the Wallbox app for specific error codes and their corresponding explanations. These codes often pinpoint the source of the problem.
Power cycling both the Wallbox and your vehicle can sometimes clear temporary faults. If errors continue, contact Wallbox support, providing the error code and details of the issue for expert assistance.
Wallbox Not Powering On
If your Wallbox Pulsar Plus fails to power on, begin by checking the circuit breaker in your electrical panel. Ensure it hasn’t tripped and, if so, reset it; Verify the Wallbox is receiving power by testing the voltage at the unit’s terminals with a multimeter – caution: this should only be performed by a qualified electrician.
Inspect the wiring connections for looseness or corrosion, ensuring all connections are secure and clean. Confirm the Wallbox is properly grounded. If the issue persists, check the Wallbox app for any reported communication errors, as a network issue could prevent proper startup.
If none of these steps resolve the problem, contact Wallbox support for further assistance, providing details about the installation and any observed symptoms.

Wallbox and Vehicle Compatibility
Wallbox ensures broad compatibility with most electric vehicles, and has established a global partnership with Fisker for integrated home charging solutions.
The Pulsar Plus supports a wide range of EVs, offering reliable and efficient charging for diverse vehicle models currently available.
Supported Electric Vehicle Models
The Wallbox Pulsar Plus is designed for compatibility with a vast array of electric vehicle models currently on the market, and those anticipated in the near future. While a comprehensive, constantly updated list is available on the Wallbox website, several key vehicles are confirmed to function seamlessly with the charger.
These include popular models from Tesla (all variants), Chevrolet (Bolt EV/EUV), Nissan (LEAF), BMW (i3, i4, iX), Ford (Mustang Mach-E, F-150 Lightning), Hyundai (IONIQ 5, Kona Electric), Kia (EV6, Niro EV), and Volkswagen (ID.4).
Furthermore, Wallbox’s partnership with Fisker ensures optimal charging integration for all Fisker Ocean models. The Pulsar Plus adheres to industry-standard charging protocols, maximizing compatibility and providing a reliable charging experience regardless of vehicle make or model. Users are encouraged to consult the Wallbox website for the most current compatibility information.
Fisker Partnership and Charging Solutions
Wallbox proudly serves as Fisker’s global partner for providing home electric vehicle (EV) charging solutions, a collaboration designed to enhance the ownership experience for Fisker Ocean customers. This strategic alliance ensures seamless integration between Wallbox chargers and Fisker vehicles, optimizing charging performance and convenience.
Through this partnership, Wallbox home chargers are readily available to Fisker owners, offering a streamlined purchasing and installation process. Fisker customers benefit from Wallbox’s advanced features, including smart charging capabilities, energy management tools like Power Boost, and the intuitive Wallbox app for remote control and monitoring.
This collaboration underscores both companies’ commitment to accelerating EV adoption by providing accessible and reliable charging infrastructure. Wallbox and Fisker are jointly dedicated to delivering a superior charging experience, tailored to the unique needs of EV drivers.

Warranty Information and Support
Wallbox stands behind the quality and reliability of the Pulsar Plus EV charger with a comprehensive warranty, protecting against defects in materials and workmanship. Specific warranty terms and duration vary by region, so please consult the official warranty documentation included with your product for detailed coverage information.
Should you encounter any issues or require assistance, Wallbox offers a robust support network. Access online resources, including FAQs, troubleshooting guides, and video tutorials, through the official Wallbox website. Dedicated customer support teams are available via phone and email to address your inquiries and provide technical assistance.
Wallbox is committed to ensuring a positive ownership experience. Prompt and efficient support is a priority, helping you maximize the benefits of your Pulsar Plus charger and enjoy seamless EV charging.